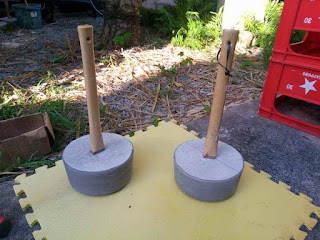
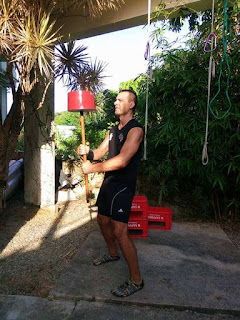
Once we had made Chi-ishi we had to continue the adventure and make a makiwara too.
James likes to hit things, and I've wanted to make my very own makiwara since not long after i started karate and i would watch Steve sensei hitting his one. Maybe i'll like to hit things too.
By no means are these perfect makiwara. Nevertheless, for a first attempt using the materials and space that we had, we have ended up with something practical, replaceable and pretty cool if you ask me.
With our new 'let's do it' mindset we're getting some really cool stuff done and learning lots along the way.
To make the makiwara you simply need:
Cement
Wood ( a strong hardwood that wont break easily and treated if it will be outside)
Rope/ old belts/ material to wrap it
Big rocks and blocks (Optional)
Step 1-
Dig a hole.
We chose a small space at James' house that is under his balcony- so it is covered from the rain (somewhat) and it has the house foundations we will be using as back support for the posts.
Ideally we were thinking about digging a hole probably just under a meter deep. We figured the deeper, the stronger- right?!
But we came across more concrete foundations once we reached maybe just over half a meter deep and so decided we would make do with it.
Step 2-
Cut your wood to desired length.
Because we were burying the posts shallower than planned we had to cut a piece off. We used the spare pieces to go behind the posts for support.
Step 3-
Set up the posts as you want them to be.
We had one big piece of hardwood for James' big heavy duty one and a smaller piece of more flexible wood for a snappier more forgiving makiwara for me.
Since we have made them and played with them a little, they are pretty different and i think we can both benefit from using both of them.
Step 4-
Mix up the cement.
It took more than what we were anticipating. We used five 20kg bags in total for the two makiwara. Three bags for the bigger one and two for the smaller one.
Step 5-
We decided to cement the two makiwara separately so that if we have to repair/ move or change anything then we don't necessarily have to move both of them.
Step 6-
Let the cement dry and personalise as you see fit ;)
Replace the dirt and ground around the cement, making sure to fill in all the small gaps and jump it down as you go along.
Once it's all somewhat evened out you're almost finished.
Step 8-
Finally you need to add the 'maki' to your makiwara.
James had some old belts that we could use instead of rope. Works just as well and is even a bit more forgiving on the hands :)
There may be a few things we will change next time, but for the time being; we can hit them and use them for their purpose. Hence i think we did a good job.


